Bread Starter Test

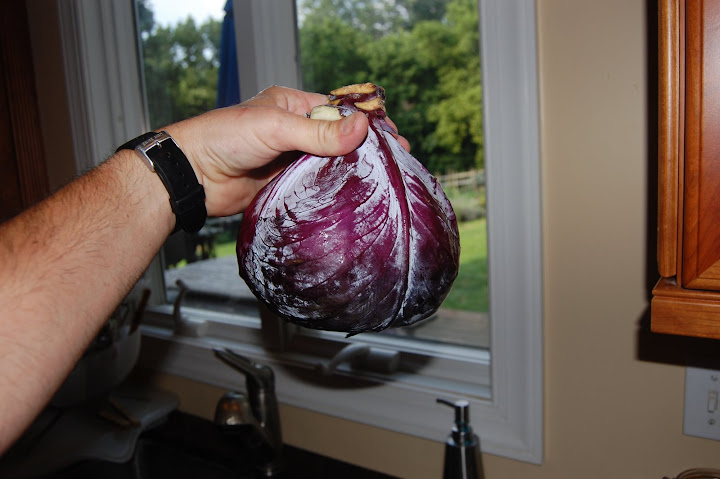
Way back in July (7/21 to be precise) Michael Ruhlman posted about a method of kick starting sourdough starter. The method, which he learned from Carri Thurman of Two Sisters Bakery in Homer, Alaska called for the addition of a red cabbage leaf to a mixture of flour and water.

Both Ruhlman and Thurman, as well as several of the former’s readers, reported remarkable results. Yet no one could explain why the cabbage had the reported effects.

Some speculated that the cabbage was loaded with wild yeast, while others (myself included) thought that bacteria might be responsible for the uptick in microbial activity and signs of fermentation (gas bubbles). Since no one could provide a plausible explanation for what might be occurring, I decided to test the idea with a series of tests.

Last night I conducted the first test. The purpose of this particular test was to answer the question “Will adding rinsed and un-rinsed organic red cabbage to a mixture of flour and water make any difference in the rate at which the mixtures ferment?”

Test Design

I made up 7 samples. Each sample contained 20 g of unbleached non-organic bread flour (I wanted as little as possible yeast in the flour) and 50 g of unchlorinated tap water.

  • In three of the glasses I put 5 g each of red cabbage that had been rinsed (as per Carri’s method) under luke warm water.
  • In three glasses I put 5 g each of red cabbage that had not been rinsed
  • In one (Control) glass I put only flour and water

Each sample was mixed with a spoon which was washed with hot water and soap to avoid cross-contamination of the samples. The I left the samples uncovered on the counter in my (68 degree F) kitchen overnight before checking them 13 hours later.

By 7 Am this morning, none of the samples, not even the control have shown any signs of fermentation. Even now (almost 14 hours after mixing) there are no obvious signs of fermentation.

Ruhlman and Thurman suggest that additional flour (a “feeding”) and 48 hours of incubation is required to produce vigorous bubbling. I will let my sample go at least that long before drawing any conclusions. (I will not add more flour.) If after 48 hours, two or more of the samples with cabbage appear to be fermenting more rapidly than the control, I will assume that the cabbage is contributing something to the process and move to the next phase of the testing which will be designed to answer the question

“Will limiting the supply of oxygen have an effect on how the flour cabbage mixture ferments?”

This question is designed to begin to get a handle on what (if any) microbe on the cabbage is responsible for the enhanced fermentation reported by Ruhlman, Thurman and others.

Brine Dilution

A couple of weeks ago I told you how I started a batch of pickled onions. At the time I expected the onions to be ready in about 10 to 14 days. Well, I am happy to report that after about 16 days in the aging room they were almost done. On the day that these pictures were taken the onions had softened to the texture of a peeled Macintosh or Macoun apple and were almost sour enough to be considered a proper pickle ( I’m guessing pH 4.0; my pH meter is dead.).

They were, however, too salty so I diluted the brine from 5 to 3.5% salinity.

Pickled Onions

Get a gander of my latest adventure in lactic acid fermentation: pickled (or more precisely “pickling”) onions.

I started this project last Friday morning as I pulled into the farm and immediately began yanking onions out of the onion field adjacent to the parking lot. After about an hour of yanking, I rinsed them off with the hose outside the door of the milking parlor and hauled them into the kitchen for prepping (about 2 hours) and brining (30 minutes). Now the wait is on.

The slide show depicts most of the steps involved with captions written in a “How To” voice. None of the steps require a greater apprehension of culinary science and technique than might be found in a teenaged chimpanzee -albeit a teen chimp who hangs around kitchens.

On the Need to Know

I never thought I did an especially good job of leading my students at The Culinary Institute of America to understand that knowing why food behaves in the ways that it does when we manipulate it, is just as important as knowing how to cook. I think at best I probably reinforced the belief that consistently positive outcomes in the kitchen are not possible if you don’t understand the science to a few who already believed it. But I’m sure that my entreaties to question everything that happens and to not take anything for granted was lost on the majority of students who, in all fairness, were mostly of the popular opinion that an Institute was not, like a college or university, supposed to encourage skepticism as much as train them in a specific set of tasks.

However, expectations of the school and my role as a teacher there aside, the truth remains that unless you always cook from carefully vetted recipes in the same place on the same equipment with ingredients that are produced and stored under the same conditions, unexpected things are going to happen. And forget it if you, like most cooks, like to fiddle around with or develop your own recipes.

This point was driven home to me this morning during a reading of a method for making sour dough starter at Michael Ruhlman’s blog. The method he described involved adding a cabbage leaf to a mixture of flour and water, letting sit overnight, dosing it with flour and water again and letting it sit for another night before using it. I don’t doubt for a moment that the method produces the vigorously bubbling starter that he describes, but I’m not sure why it bubbles faster than a simple mixture of flour and water left to ferment for the same period of time.

The obvious answer is that there is yeast on the cabbage leaves that is introduced to the starter. But why would we assume that the yeast that lives on cabbage is capable of colonizing wheat? There are thousands of species of yeast, many of them quite host specific and not all of them capable of digesting starch. There is very little starch in cabbage so why would cabbage host significant number of starch digesting yeast?

Another possibility is that the cabbage is adding in invert sugar which the yeast gobble up. However, neither Ruhlman nor the person he learned the method from (Carri at Two Sister’s Bakery in Homer, Alaska) report crushing the leaves to release sugar from the cells which, I think would be required to extract enough of the cabbages’ measly <3% sugar content to produce the dramatic bubbling they report.

It is possible that what is introduced to the starter by the cabbage is some type of bacteria. Bacteria will produce gas just like yeast, and if the right kind are introduced will drop the pH and make the starter sour. One type of bacterium that is always found on cabbage that has not been cooked or fumigated is Leuconostoc bacteria which produces prodigious amounts of bad smelling gas. However, if Leuconostoc bacteria is present in Ruhlman’s starter culture he reports no off odors. Not yet at least.

Not knowing what the cabbage is doing in his starter is not great. Professional bakers have been making starter in very specific ways from flour only for generations because that is the best way to assure a microflora that be built exclusively of a specific population of yeasts and lactic acid producing bacteria. I would not be at all surprised to find that in a few days he discovers that his starter has a big colony of funky smelling bacteria blooming on its surface. I’ve had that happen to me a few times after I’ve added something unique to my starter.

Give me some skin

It’s a little embarrassing to admit this, but there was a time in the early 1980’s when I used to pull the skin off of chicken to make stock. I seem to recall thinking that removing the skin would make it easier to degrease which, of course, is true. However, skin is loaded with flavorful molecules and contains a large amount of collagen protein which, when heated in the presence of water, breaks down to gelatin. And as most of you know, it is gelatin that gives chicken stock, or any meat stock its “body” or “heft.” So removing the skin is stupid.

Nowadays, I not only leave the skin on when I make stock, but I often add extra skin to bulk it up. At work we ask the farmer who raises, slaughters and butchers our chicken to save the skin which he sends to us in 5 pound bags. I don’t use all of the skin he sends in stocks, some I add into poultry sausages when i think the meat is too lean. But I’ll be damned if I’ll be tossing it out the way I did when I was a wet-behind-the-ears chef wannabe.

Posted by Picasa

Slow Salami Sunday UPDATE

Last Sunday I wrote about how I acted on an urge to make a batch of Tuscan style salami. The post outlined the process up to the beginning of the fermentation of the meat. Today’s post picks up the process on Wednesday when I retrieved the meat from the refrigerator in my garage and ground it.
It was my intention to stuff it at home too. But I decided against it when I realized that the stuffing attachment for my Kitchenaid stand mixer would ruin the texture by pulverizing the fat -which I wanted to remain in ~1/4″ chunks- as it worked along the worm gear. So I took the forcemeat to the farm and expressed it into hog casing with the piston stuffer then brought it home to age.

Salami Stuffing Process

At the farm I always age the meat in the cheese aging room which is well controlled for humidity, temperature and air flow. But whenever I’ve aged meat at home in the past, I’ve winged it by hanging it in the basement and crossing my fingers. Well, I’ve decided not to do that anymore and build an aging room. But before I start shooting nails into the foundation and putting up studs I’m going to tinker around with different prototypes by way of determining how big the room needs to be, how often the air needs to turn over etc.

Here is my first prototype aging room. I put it up on Saturday in about an hour. Humidity is controlled by a vaopirizer hooked up to a timer. The air is turn over twice a day by a small fan (also on a timer). I expect that future versions of this will include a larger humidifer with a humdistat and a larger much slower turning fan.

Aging Room

Recipe Pro-Tool

Michael Ruhlman’s recent post about cookbooks that teach got me thinking about how much I used to love cookbooks. Back when I was a novice cook, books like “The Joy of Cooking,” “The Professional Chef” (the basis of The Culinary Institute of Americas’ “The New Professional Chef”), Henri Pellaprat’s “Modern Culinary Art,” almost anything by Ada Boni and Julia Child and, of course, “Le Guide Culinaire” by Auguste Escoffier and La Scienza della Cucina by Pelligrino Artusi were an important part of my culinary education. Some were goldmines of information about technique (e.g. The Pro Chef, “La Methode” by Jacques Pepin) and recipes while the ones I liked best were backward looking works chosen more for what they could tell me about the history, culture and ideology of European culinary tradition.

Nowadays, I’ve little use for cookbooks. I have a few that I refer to when I need to be reminded of the the name of a dish or the ratio of it’s ingredients, but there aren’t too many things in the western culinary canon that I have to cook (or chose to cook) that I can’t make up on the fly without having to refer to somebody else’s recipe.

That’s about how it should be for a cook I suppose. I mean, is not a big part of the reason we decide to center our lives around cooking so that we can create recipes that reflect our values and tastes? There is certainly nothing wrong with working from recipes written by other people and trying to satisfy our creative drive by say, changing an ingredient or applying a different technique to one or more the steps. But I find building my own recipes more fulfilling.

I don’t usually write recipes unless I am creating them for work and I rarely include the instructions for method unless I’m working on something that is very new to me. Then, if the dish doesn’t come out well and needs refinement I have a precise record of what I did to review.

I write my recipes for commercial production in a form that would probably madden cooks who like to measure liquids and semi-solids volumetrically.

  1. Every ingredient is weighed and each weight is expressed as a decimal.
  2. All weights are expressed in metric units (mostly grams)
  3. All ingredients are expressed as a percentage of the main ingredient to facilitate scaling up and down (called a baker or formula percentage)

Here is an example in the form of a recipe for Chicken Sausage with Ginger and Green Onions

Ingredient Weight Percentage
Chicken meat 8636g 1
Salt 121g 0.014
Pepper, black 34g 0.004
Ginger in syrup* 173g 0.020
Green Onions 224g 0.026
Mustard, dry 13g 0.0015
White wine 604 g (~604 ml) 0.070

* Whole unpeeled ginger cooked in simple syrup and ground through the fine on a meat grinder. The ginger has to be cooked if the sausage will sit uncooked for more than a few hours. Otherwise the proteolytic enzymes in the ginger will turn the meat to mush.

I initially made this recipe by weighing small amounts of each ingredient and recording the weights before adding them in. Each time I added something sniffed the mixture to determine if it was properly seasoned. I can usually nail the seasoning of a sausage recipe via an olfactory and visual check but on those occasions where I am unsure I’ll cook up a sample and taste it.

I always salt fresh sausage at a rate of either 14-15g salt per 1000 grams of meat (see note below) depending on the kind of meat being used and the taste characteristics of the other ingredients. The percentage of each ingredient is obtained by dividing the weight of each by the weight of the main ingredient.

The beauty of this kind of recipe is that it makes it very easy to increase or decrease the batch size while keeping the ratio of ingredients consistent and producing a consistent product no matter how much or how little you make.

Want to make more or less? Then enter the new weight of the meat and multiply it by the percent values of the subordinate ingredients and you are done.

The example I gave here is for sausage, but this format works for any kind of recipe. Just pick a main ingredient (It does not have to be the most abundant, it could, for example be the most expensive. Then divide the weight of each subsequent ingredient by the weight of the main ingredient to determine its percentage value.

Finally, one can purchase software that will scale recipes up and down for you automatically. Or you can write the formula recipe into a spread sheet, apply costs and so on. (I’ve done this.) But typing on a keyboard when your fingers are fouled with food is not such a good idea. So writing them out by hand is usually the best way to go.

Note: The previously given rate of 0.014-0.015g salt per 1000g meat was in error and has been corrected to read 14-15g salt per 1000g meat.

Roast Beef Recipe Circa 1955

Here’s a roast beef recipe that is sure to raise an eyebrow. It’s from comedic genius Gracie Allen. I’ve included a YouTube video of the The George Burns and Allen Show that contains a reference to the recipe @ circa 25 minutes into the show.

FW: Gracies kitchen magic

Gracie Allen’s Classic Recipe for Roast Beef

1 large Roast of beef
1 small Roast of beef

Take the two roasts and put them in the oven.

When the little one burns, the big one is done.

Ratio This!

See Michael Ruhlman on The Early Show (CBS) as he promotes Ratio, his- to my mind sucessful- first attempt to bring Platonic order to the fundamental preparations of western cooking.

Watch CBS Videos Online

Sunday Dinner @ Saturday

Last night (Friday) we celebrated our daughter’s 15th birthday by hiding in our bedroom with the door locked while she and four of her friends had a “sleep-over” party. Actually, I’m kidding about hiding in the bedroom. I thought about doing something like that all week but it turned out to be unnecessary because the kids were extraordinarily well behaved. I suppose I can thank my daughter’s computer for keeping them occupied by tricking them into spending hours making videos and posting them on Facebook along with comments that might have been written in glyphs for all the sense they make to me. But the better part of the credit for how well they all behaved has to go to them, because they are all good kids. And now I think I know why.

I think all of them, including my 12 year old son, is extremely religious. This surprised me a little because I’m not a very spiritual being at all, and am always slightly taken aback when I witness others who reference gods or God in casual conversation. So imagine my surprise when I hear these 5 teenagers and my son offering practically every other comment that came from their mouths up to the Creator. If I had a dime for every time one of them said “Oh My God!” I could forget about the miserable condition of my investments and put a down payment on Bernie Madoff’s Palm Beach house.

Of course, I’m kidding around about the religiosity of the kids. But they did keep me up way past my normal bedtime with their OMGod-ing. So, today I decided to stay home and get a leg up on Sunday dinner.

Earlier in the week I made 3 pounds of pasta dough and today cranked it out and into 2 lasagna. There was some dough left over so I rolled and cut that into pasta alla chitarra and two forms of short noodles. I also baked off a loaf of bread. You can see most of this in the slide show below.

Tomorrow I will pull out the pork shoulder that I brined (10 days) and studded with garlic and rosemary. Then I will cook it, low and slow, on the charcoal grill.

By the way, this is the style of cooking that I grew up around. It’s not anything I learned in school or from a book. It’s the way my mom and my paternal grandparents and all of my relatives from Borgotaro and Porcigatone, Emilia Romagna addressed a meal. It’s odd to think that someone might consider this fancy cooking when in reality -my family’s reality anyway- it’s just Sunday dinner.

Here is the basic menu. I’m sure it’ll change a bit by tomorrow evening.

Antipasto of grilled sardines, olives, bresaola, tuscan salami, fennel
Lasagna al forno alla Bolognese
Roasted pork shoulder & broccoli rabe
Salad of spinach, endive, raddicchio, pears with pine nuts Balsamic vinaigrette (emulsified)
Cheese and fruit (St. Andre, Hendricks F&D Bavarian Swiss, Fromage d’ Affinois “Florette”)
Ice cream (for the kids)